

对于准备搭建跨境电商网站的人,一部分人会在WooCommerce和Shopify中做抉择。不知道该选择哪个系统来搭建。
![图片[1]-为WooCommerce创建支付网关插件 - KEKC博客-KEKC博客](http://www.kekc.cn/wp-content/uploads/2022/06/4acd358815cb.png)
其实这样的纠结国外网友也有所纠结,甚至还有很多文章将他们做对比,以便人们做出抉择,选出适合自己的系统。
![图片[2]-为WooCommerce创建支付网关插件 - KEKC博客-KEKC博客](http://www.kekc.cn/wp-content/uploads/2022/06/b056f1d6860a.png)
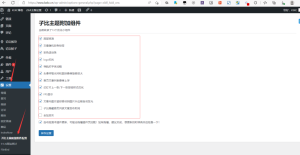
但对于我来说,WooCommerce模板众多,可以选择出我们需要的模板,生态好,而且数千个钩子更加利于开发者开发,而我又没有接触过Shopify,就这些,我力挺WooCommerce。
但是,国内WooCommerce支付生态貌似不太友好,对于免费的支付网关很少能找到。于是我就打算看一下怎么开发WooCommerce的支付网关。
创建插件
因为WooCommerce有很多的钩子,所以我们在开发支付网关的时候,只需按照一个“框架”来开发就好,下面的是插件框架:
<?php/** Plugin Name: WooCommerce自定义支付网关* Plugin URI: https://www.kekc.cn/* Description: 这个插件是我们开发自定义支付网关时的示例插件* Author: kekc* Author URI: https://www.kekc.cn* Version: 1.0.0*//** 这个动作钩子将我们的PHP类注册为WooCommerce的支付网关*/add_filter( 'woocommerce_payment_gateways', 'kekc_cn_add_gateway_class' );function kekc_cn_add_gateway_class( $gateways ) {$gateways[] = 'WC_kekc_cn_Gateway'; // 类似一个支付别名return $gateways;}/** 注意它是在plugins_loaded动作钩子里面的,也就是插件加载时的hook*/add_action( 'plugins_loaded', 'kekc_cn_init_gateway_class' );function kekc_cn_init_gateway_class() {class WC_kekc_cn_Gateway extends WC_Payment_Gateway {/*** 从这里开始执行,我们先放在这,之后详细讲*/public function __construct() {...}/*** 插件选项,也就是插件的设置页面的设置项,也在之后详细说*/public function init_form_fields(){...}/*** 支付字段,填一些表单数据,字段等,比如用信用卡支付的信用卡号之类的*/public function payment_fields() {...}/** 自定义CSS和JS,在大多数情况下,只有当你决定使用自定义支付字段时才需要。*/public function payment_scripts() {...}/** 字段验证*/public function validate_fields() {...}/** 在这里处理付款*/public function process_payment( $order_id ) {...}/** 如果你需要一个webhook,如PayPal IPN等,可以新建个函数,以便在其他函数中使用它*/public function webhook() {...}}}<?php /* * Plugin Name: WooCommerce自定义支付网关 * Plugin URI: https://www.kekc.cn/ * Description: 这个插件是我们开发自定义支付网关时的示例插件 * Author: kekc * Author URI: https://www.kekc.cn * Version: 1.0.0 */ /* * 这个动作钩子将我们的PHP类注册为WooCommerce的支付网关 */ add_filter( 'woocommerce_payment_gateways', 'kekc_cn_add_gateway_class' ); function kekc_cn_add_gateway_class( $gateways ) { $gateways[] = 'WC_kekc_cn_Gateway'; // 类似一个支付别名 return $gateways; } /* * 注意它是在plugins_loaded动作钩子里面的,也就是插件加载时的hook */ add_action( 'plugins_loaded', 'kekc_cn_init_gateway_class' ); function kekc_cn_init_gateway_class() { class WC_kekc_cn_Gateway extends WC_Payment_Gateway { /** * 从这里开始执行,我们先放在这,之后详细讲 */ public function __construct() { ... } /** * 插件选项,也就是插件的设置页面的设置项,也在之后详细说 */ public function init_form_fields(){ ... } /** * 支付字段,填一些表单数据,字段等,比如用信用卡支付的信用卡号之类的 */ public function payment_fields() { ... } /* * 自定义CSS和JS,在大多数情况下,只有当你决定使用自定义支付字段时才需要。 */ public function payment_scripts() { ... } /* * 字段验证 */ public function validate_fields() { ... } /* * 在这里处理付款 */ public function process_payment( $order_id ) { ... } /* * 如果你需要一个webhook,如PayPal IPN等,可以新建个函数,以便在其他函数中使用它 */ public function webhook() { ... } } }<?php /* * Plugin Name: WooCommerce自定义支付网关 * Plugin URI: https://www.kekc.cn/ * Description: 这个插件是我们开发自定义支付网关时的示例插件 * Author: kekc * Author URI: https://www.kekc.cn * Version: 1.0.0 */ /* * 这个动作钩子将我们的PHP类注册为WooCommerce的支付网关 */ add_filter( 'woocommerce_payment_gateways', 'kekc_cn_add_gateway_class' ); function kekc_cn_add_gateway_class( $gateways ) { $gateways[] = 'WC_kekc_cn_Gateway'; // 类似一个支付别名 return $gateways; } /* * 注意它是在plugins_loaded动作钩子里面的,也就是插件加载时的hook */ add_action( 'plugins_loaded', 'kekc_cn_init_gateway_class' ); function kekc_cn_init_gateway_class() { class WC_kekc_cn_Gateway extends WC_Payment_Gateway { /** * 从这里开始执行,我们先放在这,之后详细讲 */ public function __construct() { ... } /** * 插件选项,也就是插件的设置页面的设置项,也在之后详细说 */ public function init_form_fields(){ ... } /** * 支付字段,填一些表单数据,字段等,比如用信用卡支付的信用卡号之类的 */ public function payment_fields() { ... } /* * 自定义CSS和JS,在大多数情况下,只有当你决定使用自定义支付字段时才需要。 */ public function payment_scripts() { ... } /* * 字段验证 */ public function validate_fields() { ... } /* * 在这里处理付款 */ public function process_payment( $order_id ) { ... } /* * 如果你需要一个webhook,如PayPal IPN等,可以新建个函数,以便在其他函数中使用它 */ public function webhook() { ... } } }
上面的只是插件框架的展示,如果您在插件文件中按原样插入了上面的代码,则会收到500错误。下面我们来完善class方法
具体class方法
1、构造函数
public function __construct() {$this->id = 'kekc_cn'; // 支付网关插件ID,可以字符串,但是要唯一$this->icon = ''; // 将显示在结账页上你的支付网关图标。内容为URL$this->has_fields = true; // 你需要自定义支付网关字段就填true$this->method_title = 'kekc_cn Gateway';$this->method_description = 'Description of kekc_cn payment gateway'; // 显示在选项页上// 网关可以支持订阅、退款、保存支付方式。// 但在本教程中,我们从简单的支付开始$this->supports = array('products');// 所有选项字段的方法$this->init_form_fields();// 加载设置$this->init_settings();$this->title = $this->get_option( 'title' );$this->description = $this->get_option( 'description' );$this->enabled = $this->get_option( 'enabled' );$this->testmode = 'yes' === $this->get_option( 'testmode' );$this->private_key = $this->testmode ? $this->get_option( 'test_private_key' ) : $this->get_option( 'private_key' );$this->publishable_key = $this->testmode ? $this->get_option( 'test_publishable_key' ) : $this->get_option( 'publishable_key' );// 这个动作钩子保存上面的设置add_action( 'woocommerce_update_options_payment_gateways_' . $this->id, array( $this, 'process_admin_options' ) );// 我们需要自定义的JavaScript来获得tokenadd_action( 'wp_enqueue_scripts', array( $this, 'payment_scripts' ) );// 你也可以在这里注册一个webhook// add_action( 'woocommerce_api_{webhook name}', array( $this, 'webhook' ) );}public function __construct() { $this->id = 'kekc_cn'; // 支付网关插件ID,可以字符串,但是要唯一 $this->icon = ''; // 将显示在结账页上你的支付网关图标。内容为URL $this->has_fields = true; // 你需要自定义支付网关字段就填true $this->method_title = 'kekc_cn Gateway'; $this->method_description = 'Description of kekc_cn payment gateway'; // 显示在选项页上 // 网关可以支持订阅、退款、保存支付方式。 // 但在本教程中,我们从简单的支付开始 $this->supports = array( 'products' ); // 所有选项字段的方法 $this->init_form_fields(); // 加载设置 $this->init_settings(); $this->title = $this->get_option( 'title' ); $this->description = $this->get_option( 'description' ); $this->enabled = $this->get_option( 'enabled' ); $this->testmode = 'yes' === $this->get_option( 'testmode' ); $this->private_key = $this->testmode ? $this->get_option( 'test_private_key' ) : $this->get_option( 'private_key' ); $this->publishable_key = $this->testmode ? $this->get_option( 'test_publishable_key' ) : $this->get_option( 'publishable_key' ); // 这个动作钩子保存上面的设置 add_action( 'woocommerce_update_options_payment_gateways_' . $this->id, array( $this, 'process_admin_options' ) ); // 我们需要自定义的JavaScript来获得token add_action( 'wp_enqueue_scripts', array( $this, 'payment_scripts' ) ); // 你也可以在这里注册一个webhook // add_action( 'woocommerce_api_{webhook name}', array( $this, 'webhook' ) ); }public function __construct() { $this->id = 'kekc_cn'; // 支付网关插件ID,可以字符串,但是要唯一 $this->icon = ''; // 将显示在结账页上你的支付网关图标。内容为URL $this->has_fields = true; // 你需要自定义支付网关字段就填true $this->method_title = 'kekc_cn Gateway'; $this->method_description = 'Description of kekc_cn payment gateway'; // 显示在选项页上 // 网关可以支持订阅、退款、保存支付方式。 // 但在本教程中,我们从简单的支付开始 $this->supports = array( 'products' ); // 所有选项字段的方法 $this->init_form_fields(); // 加载设置 $this->init_settings(); $this->title = $this->get_option( 'title' ); $this->description = $this->get_option( 'description' ); $this->enabled = $this->get_option( 'enabled' ); $this->testmode = 'yes' === $this->get_option( 'testmode' ); $this->private_key = $this->testmode ? $this->get_option( 'test_private_key' ) : $this->get_option( 'private_key' ); $this->publishable_key = $this->testmode ? $this->get_option( 'test_publishable_key' ) : $this->get_option( 'publishable_key' ); // 这个动作钩子保存上面的设置 add_action( 'woocommerce_update_options_payment_gateways_' . $this->id, array( $this, 'process_admin_options' ) ); // 我们需要自定义的JavaScript来获得token add_action( 'wp_enqueue_scripts', array( $this, 'payment_scripts' ) ); // 你也可以在这里注册一个webhook // add_action( 'woocommerce_api_{webhook name}', array( $this, 'webhook' ) ); }
2、添加管理配置字段
这个的话都需要把,比如开发易支付支付网关,就需要url,商户ID,商户token等,还需要“启用/禁用”,“标题”,“描述”和“测试模式”等设置项。
public function init_form_fields(){$this->form_fields = array('enabled' => array('title' => 'Enable/Disable','label' => 'Enable kekc_cn Gateway','type' => 'checkbox','description' => '','default' => 'no'),'title' => array('title' => 'Title','type' => 'text','description' => 'This controls the title which the user sees during checkout.','default' => 'Credit Card','desc_tip' => true,),'description' => array('title' => 'Description','type' => 'textarea','description' => 'This controls the description which the user sees during checkout.','default' => 'Pay with your credit card via our super-cool payment gateway.',),'testmode' => array('title' => 'Test mode','label' => 'Enable Test Mode','type' => 'checkbox','description' => 'Place the payment gateway in test mode using test API keys.','default' => 'yes','desc_tip' => true,),'test_publishable_key' => array('title' => 'Test Publishable Key','type' => 'text'),'test_private_key' => array('title' => 'Test Private Key','type' => 'password',),'publishable_key' => array('title' => 'Live Publishable Key','type' => 'text'),'private_key' => array('title' => 'Live Private Key','type' => 'password'));}public function init_form_fields(){ $this->form_fields = array( 'enabled' => array( 'title' => 'Enable/Disable', 'label' => 'Enable kekc_cn Gateway', 'type' => 'checkbox', 'description' => '', 'default' => 'no' ), 'title' => array( 'title' => 'Title', 'type' => 'text', 'description' => 'This controls the title which the user sees during checkout.', 'default' => 'Credit Card', 'desc_tip' => true, ), 'description' => array( 'title' => 'Description', 'type' => 'textarea', 'description' => 'This controls the description which the user sees during checkout.', 'default' => 'Pay with your credit card via our super-cool payment gateway.', ), 'testmode' => array( 'title' => 'Test mode', 'label' => 'Enable Test Mode', 'type' => 'checkbox', 'description' => 'Place the payment gateway in test mode using test API keys.', 'default' => 'yes', 'desc_tip' => true, ), 'test_publishable_key' => array( 'title' => 'Test Publishable Key', 'type' => 'text' ), 'test_private_key' => array( 'title' => 'Test Private Key', 'type' => 'password', ), 'publishable_key' => array( 'title' => 'Live Publishable Key', 'type' => 'text' ), 'private_key' => array( 'title' => 'Live Private Key', 'type' => 'password' ) ); }public function init_form_fields(){ $this->form_fields = array( 'enabled' => array( 'title' => 'Enable/Disable', 'label' => 'Enable kekc_cn Gateway', 'type' => 'checkbox', 'description' => '', 'default' => 'no' ), 'title' => array( 'title' => 'Title', 'type' => 'text', 'description' => 'This controls the title which the user sees during checkout.', 'default' => 'Credit Card', 'desc_tip' => true, ), 'description' => array( 'title' => 'Description', 'type' => 'textarea', 'description' => 'This controls the description which the user sees during checkout.', 'default' => 'Pay with your credit card via our super-cool payment gateway.', ), 'testmode' => array( 'title' => 'Test mode', 'label' => 'Enable Test Mode', 'type' => 'checkbox', 'description' => 'Place the payment gateway in test mode using test API keys.', 'default' => 'yes', 'desc_tip' => true, ), 'test_publishable_key' => array( 'title' => 'Test Publishable Key', 'type' => 'text' ), 'test_private_key' => array( 'title' => 'Test Private Key', 'type' => 'password', ), 'publishable_key' => array( 'title' => 'Live Publishable Key', 'type' => 'text' ), 'private_key' => array( 'title' => 'Live Private Key', 'type' => 'password' ) ); }
3、验证信息(非必须)
为什么要验证信息呢?我们有的支付网关,可以先验证用户信息,比如你银行卡支付需要接收短信验证码之类的,来确认是用户本人操作,那就需要此步骤,反之,如微信支付、支付宝支付、易支付、PayPal等等,支付都在第三方处理,不在我们服务器,所以无需验证,你可以直接空着或者是删除这个验证类方法。
比如信用卡:
- 客户填写其卡数据并单击“购买”按钮。
- 我们使用WooCommerce中的事件延迟表单提交,并将带有卡数据的AJAX请求直接发送到我们的支付处理器,
checkout_place_order - 如果客户详细信息正常,处理器将返回一个令牌,我们将其添加到下面的表格中,
- 现在我们可以提交表格(当然在JS中),
- 我们使用PHP中的令牌通过支付处理器的API捕获付款。
1、PHP部分
public function payment_scripts() {// 我们只需要在购物车/结账页面用JavaScript来处理一个token,看它是否正确?if ( ! is_cart() && ! is_checkout() && ! isset( $_GET['pay_for_order'] ) ) {return;}// 如果我们的支付网关被禁用,我们就不需要js了if ( 'no' === $this->enabled ) {return;}// 如果没有设置API密钥,就不需要jsif ( empty( $this->private_key ) || empty( $this->publishable_key ) ) {return;}// 除非你的网站处于测试模式,否则不要在没有SSL的情况下验证。if ( ! $this->testmode && ! is_ssl() ) {return;}// 让我们假设这是我们的支付处理器的JavaScript,它能得到一个tokenwp_enqueue_script( 'kekc_cn_js', 'https://www.kekc_cnpayments.com/api/token.js' );// 这是在插件目录中的自定义JS,与token.js一起处理。wp_register_script( 'woocommerce_kekc_cn', plugins_url( 'kekc_cn.js', __FILE__ ), array( 'jquery', 'kekc_cn_js' ) );// 在大多数支付处理程序中,必须使用公共密钥来获得一个tokenwp_localize_script( 'woocommerce_kekc_cn', 'kekc_cn_params', array('publishableKey' => $this->publishable_key) );wp_enqueue_script( 'woocommerce_kekc_cn' );}public function payment_scripts() { // 我们只需要在购物车/结账页面用JavaScript来处理一个token,看它是否正确? if ( ! is_cart() && ! is_checkout() && ! isset( $_GET['pay_for_order'] ) ) { return; } // 如果我们的支付网关被禁用,我们就不需要js了 if ( 'no' === $this->enabled ) { return; } // 如果没有设置API密钥,就不需要js if ( empty( $this->private_key ) || empty( $this->publishable_key ) ) { return; } // 除非你的网站处于测试模式,否则不要在没有SSL的情况下验证。 if ( ! $this->testmode && ! is_ssl() ) { return; } // 让我们假设这是我们的支付处理器的JavaScript,它能得到一个token wp_enqueue_script( 'kekc_cn_js', 'https://www.kekc_cnpayments.com/api/token.js' ); // 这是在插件目录中的自定义JS,与token.js一起处理。 wp_register_script( 'woocommerce_kekc_cn', plugins_url( 'kekc_cn.js', __FILE__ ), array( 'jquery', 'kekc_cn_js' ) ); // 在大多数支付处理程序中,必须使用公共密钥来获得一个token wp_localize_script( 'woocommerce_kekc_cn', 'kekc_cn_params', array( 'publishableKey' => $this->publishable_key ) ); wp_enqueue_script( 'woocommerce_kekc_cn' ); }public function payment_scripts() { // 我们只需要在购物车/结账页面用JavaScript来处理一个token,看它是否正确? if ( ! is_cart() && ! is_checkout() && ! isset( $_GET['pay_for_order'] ) ) { return; } // 如果我们的支付网关被禁用,我们就不需要js了 if ( 'no' === $this->enabled ) { return; } // 如果没有设置API密钥,就不需要js if ( empty( $this->private_key ) || empty( $this->publishable_key ) ) { return; } // 除非你的网站处于测试模式,否则不要在没有SSL的情况下验证。 if ( ! $this->testmode && ! is_ssl() ) { return; } // 让我们假设这是我们的支付处理器的JavaScript,它能得到一个token wp_enqueue_script( 'kekc_cn_js', 'https://www.kekc_cnpayments.com/api/token.js' ); // 这是在插件目录中的自定义JS,与token.js一起处理。 wp_register_script( 'woocommerce_kekc_cn', plugins_url( 'kekc_cn.js', __FILE__ ), array( 'jquery', 'kekc_cn_js' ) ); // 在大多数支付处理程序中,必须使用公共密钥来获得一个token wp_localize_script( 'woocommerce_kekc_cn', 'kekc_cn_params', array( 'publishableKey' => $this->publishable_key ) ); wp_enqueue_script( 'woocommerce_kekc_cn' ); }
2、JS部分
var successCallback = function(data) {var checkout_form = $( 'form.woocommerce-checkout' );// 添加一个隐藏的token提交框// console.log(data)查看tokencheckout_form.find('#kekc_cn_token').val(data.token);// 禁止token Requestcheckout_form.off( 'checkout_place_order', tokenRequest );// 现在提交form表单checkout_form.submit();};var errorCallback = function(data) {console.log(data);};var tokenRequest = function() {// 这里将是一个支付网关函数,处理来自你的表单的所有卡片数据,也许它需要你的可发布API密钥,即kekc_cn_params.publishableKey,// 并在成功时触发successCallback(),失败时触发errorCallback。return false;};jQuery(function($){var checkout_form = $( 'form.woocommerce-checkout' );checkout_form.on( 'checkout_place_order', tokenRequest );});var successCallback = function(data) { var checkout_form = $( 'form.woocommerce-checkout' ); // 添加一个隐藏的token提交框 // console.log(data)查看token checkout_form.find('#kekc_cn_token').val(data.token); // 禁止token Request checkout_form.off( 'checkout_place_order', tokenRequest ); // 现在提交form表单 checkout_form.submit(); }; var errorCallback = function(data) { console.log(data); }; var tokenRequest = function() { // 这里将是一个支付网关函数,处理来自你的表单的所有卡片数据,也许它需要你的可发布API密钥,即kekc_cn_params.publishableKey, // 并在成功时触发successCallback(),失败时触发errorCallback。 return false; }; jQuery(function($){ var checkout_form = $( 'form.woocommerce-checkout' ); checkout_form.on( 'checkout_place_order', tokenRequest ); });var successCallback = function(data) { var checkout_form = $( 'form.woocommerce-checkout' ); // 添加一个隐藏的token提交框 // console.log(data)查看token checkout_form.find('#kekc_cn_token').val(data.token); // 禁止token Request checkout_form.off( 'checkout_place_order', tokenRequest ); // 现在提交form表单 checkout_form.submit(); }; var errorCallback = function(data) { console.log(data); }; var tokenRequest = function() { // 这里将是一个支付网关函数,处理来自你的表单的所有卡片数据,也许它需要你的可发布API密钥,即kekc_cn_params.publishableKey, // 并在成功时触发successCallback(),失败时触发errorCallback。 return false; }; jQuery(function($){ var checkout_form = $( 'form.woocommerce-checkout' ); checkout_form.on( 'checkout_place_order', tokenRequest ); });
3、添加支付字段表单
public function payment_fields() {// 在支付表单前添加一些信息if ( $this->description ) {// 你可以说明测试模式,显示测试之类的。if ( $this->testmode ) {$this->description .= ' TEST MODE ENABLED. In test mode, you can use the card numbers listed in <a href="#">documentation</a>.';$this->description = trim( $this->description );}// 显示带有<p>标签的描述等。echo wpautop( wp_kses_post( $this->description ) );}// 我将用echo()的形式,你也可以直接在HTML中写echo '<fieldset id="wc-' . esc_attr( $this->id ) . '-cc-form" class="wc-credit-card-form wc-payment-form" style="background:transparent;">';// 如果你想让你的自定义支付网关支持这个动作,请添加这个动作钩子do_action( 'woocommerce_credit_card_form_start', $this->id );// #ccNo, #expdate, #cvc自己改成自己的echo '<div class="form-row form-row-wide"><label>Card Number <span class="required">*</span></label><input id="kekc_cn_ccNo" type="text" autocomplete="off"></div><div class="form-row form-row-first"><label>Expiry Date <span class="required">*</span></label><input id="kekc_cn_expdate" type="text" autocomplete="off" placeholder="MM / YY"></div><div class="form-row form-row-last"><label>Card Code (CVC) <span class="required">*</span></label><input id="kekc_cn_cvv" type="password" autocomplete="off" placeholder="CVC"></div><div class="clear"></div>';do_action( 'woocommerce_credit_card_form_end', $this->id );echo '<div class="clear"></div></fieldset>';}public function payment_fields() { // 在支付表单前添加一些信息 if ( $this->description ) { // 你可以说明测试模式,显示测试之类的。 if ( $this->testmode ) { $this->description .= ' TEST MODE ENABLED. In test mode, you can use the card numbers listed in <a href="#">documentation</a>.'; $this->description = trim( $this->description ); } // 显示带有<p>标签的描述等。 echo wpautop( wp_kses_post( $this->description ) ); } // 我将用echo()的形式,你也可以直接在HTML中写 echo '<fieldset id="wc-' . esc_attr( $this->id ) . '-cc-form" class="wc-credit-card-form wc-payment-form" style="background:transparent;">'; // 如果你想让你的自定义支付网关支持这个动作,请添加这个动作钩子 do_action( 'woocommerce_credit_card_form_start', $this->id ); // #ccNo, #expdate, #cvc自己改成自己的 echo '<div class="form-row form-row-wide"><label>Card Number <span class="required">*</span></label> <input id="kekc_cn_ccNo" type="text" autocomplete="off"> </div> <div class="form-row form-row-first"> <label>Expiry Date <span class="required">*</span></label> <input id="kekc_cn_expdate" type="text" autocomplete="off" placeholder="MM / YY"> </div> <div class="form-row form-row-last"> <label>Card Code (CVC) <span class="required">*</span></label> <input id="kekc_cn_cvv" type="password" autocomplete="off" placeholder="CVC"> </div> <div class="clear"></div>'; do_action( 'woocommerce_credit_card_form_end', $this->id ); echo '<div class="clear"></div></fieldset>'; }public function payment_fields() { // 在支付表单前添加一些信息 if ( $this->description ) { // 你可以说明测试模式,显示测试之类的。 if ( $this->testmode ) { $this->description .= ' TEST MODE ENABLED. In test mode, you can use the card numbers listed in <a href="#">documentation</a>.'; $this->description = trim( $this->description ); } // 显示带有<p>标签的描述等。 echo wpautop( wp_kses_post( $this->description ) ); } // 我将用echo()的形式,你也可以直接在HTML中写 echo '<fieldset id="wc-' . esc_attr( $this->id ) . '-cc-form" class="wc-credit-card-form wc-payment-form" style="background:transparent;">'; // 如果你想让你的自定义支付网关支持这个动作,请添加这个动作钩子 do_action( 'woocommerce_credit_card_form_start', $this->id ); // #ccNo, #expdate, #cvc自己改成自己的 echo '<div class="form-row form-row-wide"><label>Card Number <span class="required">*</span></label> <input id="kekc_cn_ccNo" type="text" autocomplete="off"> </div> <div class="form-row form-row-first"> <label>Expiry Date <span class="required">*</span></label> <input id="kekc_cn_expdate" type="text" autocomplete="off" placeholder="MM / YY"> </div> <div class="form-row form-row-last"> <label>Card Code (CVC) <span class="required">*</span></label> <input id="kekc_cn_cvv" type="password" autocomplete="off" placeholder="CVC"> </div> <div class="clear"></div>'; do_action( 'woocommerce_credit_card_form_end', $this->id ); echo '<div class="clear"></div></fieldset>'; }
![图片[3]-为WooCommerce创建支付网关插件 - KEKC博客-KEKC博客](http://www.kekc.cn/wp-content/uploads/2022/06/114c4a67ca6c.png)
4、处理付款
1、验证字段
像名字这样的结帐字段应该更早验证,但这只是一个例子:
public function validate_fields(){if( empty( $_POST[ 'billing_first_name' ]) ) {wc_add_notice( 'First name is required!', 'error' );return false;}return true;}public function validate_fields(){ if( empty( $_POST[ 'billing_first_name' ]) ) { wc_add_notice( 'First name is required!', 'error' ); return false; } return true; }public function validate_fields(){ if( empty( $_POST[ 'billing_first_name' ]) ) { wc_add_notice( 'First name is required!', 'error' ); return false; } return true; }
2、使用API获取付款并设置订单状态
public function process_payment( $order_id ) {global $woocommerce;// 根据订单id获取订单明细$order = wc_get_order( $order_id );/** 带有参数的数组,用于API交互*/$args = array(...);/** API交互可以用wp_remote_post()来构建*/$response = wp_remote_post( '{payment processor endpoint}', $args );if( !is_wp_error( $response ) ) {$body = json_decode( $response['body'], true );// 它可能是不同的,这取决于你的支付处理程序if ( $body['response']['responseCode'] == 'APPROVED' ) {// 我们收到付款$order->payment_complete();$order->reduce_order_stock();// 给客户备注。$order->add_order_note( '您的订单已经支付了! 谢谢你!', true );// 空购物车$woocommerce->cart->empty_cart();// 重定向到感谢页面return array('result' => 'success','redirect' => $this->get_return_url( $order ));} else {wc_add_notice( '请重试!', 'error' );return;}} else {wc_add_notice( '连接失败。', 'error' );return;}}public function process_payment( $order_id ) { global $woocommerce; // 根据订单id获取订单明细 $order = wc_get_order( $order_id ); /* * 带有参数的数组,用于API交互 */ $args = array( ... ); /* * API交互可以用wp_remote_post()来构建 */ $response = wp_remote_post( '{payment processor endpoint}', $args ); if( !is_wp_error( $response ) ) { $body = json_decode( $response['body'], true ); // 它可能是不同的,这取决于你的支付处理程序 if ( $body['response']['responseCode'] == 'APPROVED' ) { // 我们收到付款 $order->payment_complete(); $order->reduce_order_stock(); // 给客户备注。 $order->add_order_note( '您的订单已经支付了! 谢谢你!', true ); // 空购物车 $woocommerce->cart->empty_cart(); // 重定向到感谢页面 return array( 'result' => 'success', 'redirect' => $this->get_return_url( $order ) ); } else { wc_add_notice( '请重试!', 'error' ); return; } } else { wc_add_notice( '连接失败。', 'error' ); return; } }public function process_payment( $order_id ) { global $woocommerce; // 根据订单id获取订单明细 $order = wc_get_order( $order_id ); /* * 带有参数的数组,用于API交互 */ $args = array( ... ); /* * API交互可以用wp_remote_post()来构建 */ $response = wp_remote_post( '{payment processor endpoint}', $args ); if( !is_wp_error( $response ) ) { $body = json_decode( $response['body'], true ); // 它可能是不同的,这取决于你的支付处理程序 if ( $body['response']['responseCode'] == 'APPROVED' ) { // 我们收到付款 $order->payment_complete(); $order->reduce_order_stock(); // 给客户备注。 $order->add_order_note( '您的订单已经支付了! 谢谢你!', true ); // 空购物车 $woocommerce->cart->empty_cart(); // 重定向到感谢页面 return array( 'result' => 'success', 'redirect' => $this->get_return_url( $order ) ); } else { wc_add_notice( '请重试!', 'error' ); return; } } else { wc_add_notice( '连接失败。', 'error' ); return; } }
3、如果需要支付网关回调(支付通知,webhook等)
许多支付网关都有付款通知,这就是它的工作原理 – 一旦客户在支付网关网站上完成订单,网关就会向我们网站的特定URL发送带有$ _GET参数的请求,我们在网关的设置页面上设置WooCommerce允许处理这些请求。
Woo回调 URL示例:https://www.kekc.cn/wc-api/{webhook name}/
add_action( 'woocommerce_api_{webhook name}', array( $this, 'webhook' ) );add_action( 'woocommerce_api_{webhook name}', array( $this, 'webhook' ) );add_action( 'woocommerce_api_{webhook name}', array( $this, 'webhook' ) );
并且是可以使用$_GET收到的参数执行任何操作的函数。
public function webhook() {$order = wc_get_order( $_GET['id'] );$order->payment_complete();$order->reduce_order_stock();update_option('webhook_debug', $_GET);}public function webhook() { $order = wc_get_order( $_GET['id'] ); $order->payment_complete(); $order->reduce_order_stock(); update_option('webhook_debug', $_GET); }public function webhook() { $order = wc_get_order( $_GET['id'] ); $order->payment_complete(); $order->reduce_order_stock(); update_option('webhook_debug', $_GET); }
不必在最后添加回调,你也可以单独提取出来。


暂无评论内容